🎯 こんな方におすすめ
• iOSアプリに広告を導入したいが、設定方法がよく分からない方
• AdMobの登録〜実装までを、具体的なコード付きで知りたい方
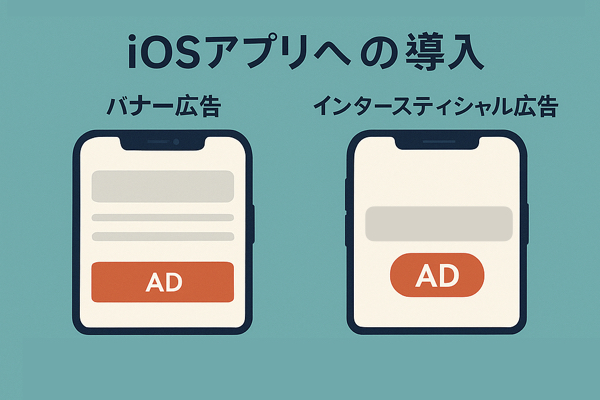
• バナー広告や全画面広告の違いや使い分けに悩んでいる方
• 小学生・子ども向けの学習アプリやゲームアプリを開発している方
• 子ども向けアプリに適した広告設定や、Googleのポリシーへの対応方法を学びたい方
• アプリを収益化しつつも、ユーザー体験を損なわない表示タイミングを知りたい方
そんなあなたに向けて、初心者でもわかりやすく解説します!
1. AdMobの登録方法
AdMob(Google Mobile Ads)はGoogleが提供するアプリ内広告サービスです。

登録手順:
- AdMob公式サイト にアクセス
- Googleアカウントでログイン
- アカウント情報(国、タイムゾーン、請求情報)を入力
- 利用規約に同意してアカウントを作成
アプリの登録:
- 管理画面左メニューから「アプリを追加」
- プラットフォームで「iOS」を選択
- アプリ名を入力(App Store未公開でも可)
- アプリIDが発行される(
ca-app-pub-xxxx~yyyy形式) - 広告ユニット(バナーやインタースティシャルなど)を作成
2. iOSアプリにAdMobを導入する方法
開発環境の準備(CocoaPods)
- CocoaPodsをインストール
sudo gem install cocoapods- プロジェクトのフォルダで:pod init を実行してPodfileを作成
pod init以下のようにPodfileを編集:
platform :ios, '13.0'
target 'YourAppName' do
use_frameworks!
pod 'Google-Mobile-Ads-SDK'
end- Podを入れる
pod install- YourApp.xcworkspace を開いて作業
YourApp.xcodeproj ではなく YourApp.xcworkspace を開いてください!
[clink url=”https://www.summer-banana.com/coding-guide/xcodeproj-vs-xcworkspace/”]
アプリIDの設定
プロジェクトのInfo.plist に以下を追加:
<key>GADApplicationIdentifier</key>
<string>ca-app-pub-xxxx~yyyy</string>
AppDelegate.swift の設定(プロジェクトに新たに追加)
import UIKit

import GoogleMobileAds

class AppDelegate: NSObject, UIApplicationDelegate {

    func application(_ application: UIApplication,

                     didFinishLaunchingWithOptions launchOptions:

                     [UIApplication.LaunchOptionsKey: Any]?) -> Bool {

        MobileAds.shared.start(completionHandler: nil)

        return true

    }

}
3. バナー広告の導入方法
BannerAdView.swift
import SwiftUI

import GoogleMobileAds

struct BannerAdView: UIViewRepresentable {

    func makeUIView(context: Context) -> BannerView {

        let banner = BannerView(adSize: AdSizeBanner)

        banner.adUnitID = "ca-app-pub-3940256099942544/2934735716"

        banner.rootViewController = UIApplication.shared.connectedScenes

            .compactMap { $0 as? UIWindowScene }

            .first?.windows.first?.rootViewController

        banner.load(Request())

        return banner

    }

    func updateUIView(_ uiView: BannerView, context: Context) {}

}
ContentView.swift(バナー広告)
struct ContentView: View {

    var body: some View {

        VStack {

            Spacer()

            Text("アプリのメイン画面")

            Spacer()

            BannerAdView()

                .frame(width: 320, height: 50)

        }

    }

}
4. インタースティシャル広告の導入方法
InterstitialAdManager.swift
import GoogleMobileAds
import SwiftUI

class InterstitialAdManager: NSObject, FullScreenContentDelegate {
    private var interstitial: InterstitialAd?
    private var adUnitID: String

    init(adUnitID: String) {
        self.adUnitID = adUnitID
        super.init()
        loadAd()
    }

    func loadAd() {
        let request = Request()
        InterstitialAd.load(with: adUnitID, request: request) { ad, error in
            if let error = error {
                print("❌ Failed to load interstitial ad: \(error.localizedDescription)")
                return
            }
            self.interstitial = ad
            self.interstitial?.fullScreenContentDelegate = self
            print("✅ Interstitial ad loaded")
        }
    }

    func showAd(from rootViewController: UIViewController) {
        if let ad = interstitial {
            ad.present(from: rootViewController)
        } else {
            print("⚠️ Interstitial ad not ready")
        }
    }

    // Ad closed → 次をロード
    func adDidDismissFullScreenContent(_ ad: FullScreenPresentingAd) {
        print("🔁 Ad dismissed. Loading next...")
        loadAd()
    }
}
ContentView.swift(インタースティシャル)
struct ContentView: View {

    let interstitial = InterstitialAdManager(adUnitID: "ca-app-pub-3940256099942544/4411468910") // テスト用ID

    var body: some View {

        VStack {

            Button("全画面広告を表示") {

                if let scene = UIApplication.shared.connectedScenes.first as? UIWindowScene,

                   let root = scene.windows.first?.rootViewController {

                    interstitial.showAd(from: root)

                }

            }

        }

    }

}
表示するタイミングの例
// 5問ごとに広告を表示
if questionCount % 5 == 0 {
    if let root = UIApplication.shared.connectedScenes.first?.delegate as? UIWindowSceneDelegate,
       let vc = root.window??.rootViewController {
        interstitial.showAd(from: vc)
    }
}
5. 子ども向けアプリへの対応方法

AdMobの設定画面で行うこと:
- アプリ登録時に「子ども向けですか?」→「はい」と選択
- 子ども向けポリシーに同意
プライバシー設定(コード)
AppDelegate.swiftに以下のコードを追加する
MobileAds.shared.requestConfiguration.tagForChildDirectedTreatment = true
これにより:
- 出会い系やギャンブルなど不適切な広告がブロック
- パーソナライズド広告が制限
6. ビルドエラー時の対応方法
よくあるエラー:
Sandbox: bash(xxxx) deny(1) file-write-create・・・
対処方法:
Xcodeの「Build Settings」 > 「Build Options」内にある ENABLE_USER_SCRIPT_SANDBOXING を No に設定してください。
これにより、Pod関連のビルド時に発生するSandbox制限エラーを回避できる可能性があります。
おわりに
AdMobはアプリ収益化において非常に有力な手段です。特に教育・キッズ向けアプリでは、広告の表示方法とプライバシー配慮が必須になります。このガイドをもとに、安全かつ効果的に広告を導入しましょう。